Dan McGrath's - Subwoofer Project

Intro
About this site
Design
Construction
Electrics
Testing
Conclusion
Parts List
Links
About Me
Comments


Intro
Why build a subwoofer?
Well.....
I had built a pair of subwoofers a while ago and really enjoyed both making them, and also the sound they made.
For some reason (I can't remember why) I sold them on to a friend after a couple of years.
I think I had bought some floor standing speakers (Eltax Symphony 6's), so didn't think I needed the subs anymore...
Anyway, I decided recently that my home cinema system could do with a nice subwoofer, and rather than buy something, I thought I'd build myself one.

If you like the look of these pictures:
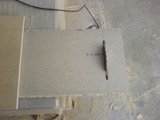
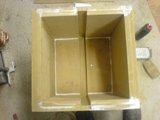
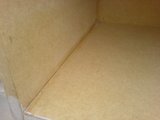
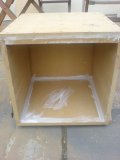
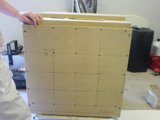
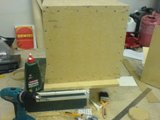
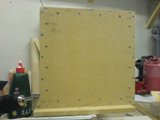
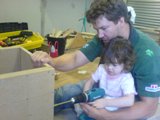
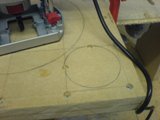
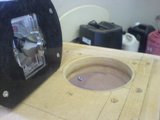
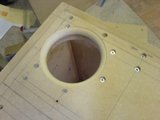
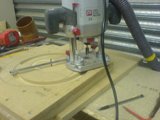
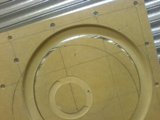
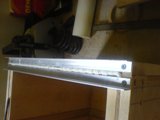
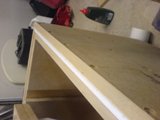
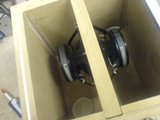
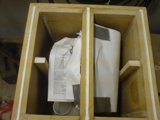
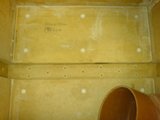
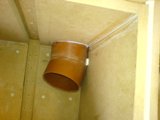
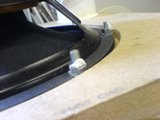
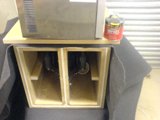
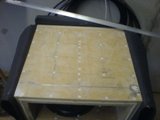
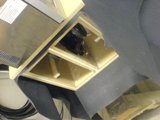
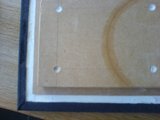
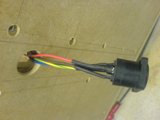
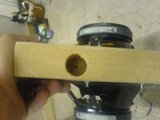
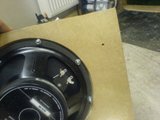
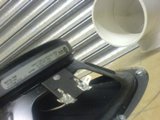
Cut 18mm MDF Neat glued internal corner I wanted a playhouse! I'm not moving until I get a playhouse! Baffle in for test fit Cutting the angles Routed port Radius cutter Circle cutting
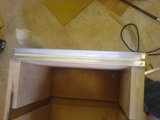
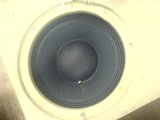
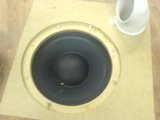
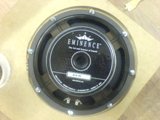
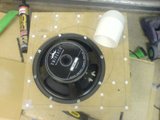
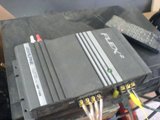
Lid gasket Silicone seal Eminence Beta 10 Neutrik Speakon Assembled baffle Neutrik Plug OFC lead Alpine flex amplifier Screws galore
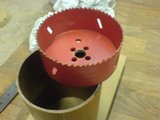
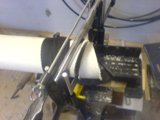
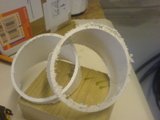
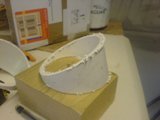
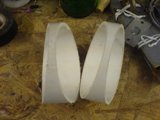
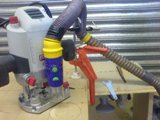
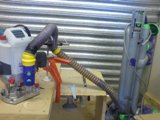
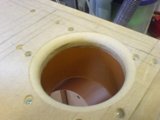
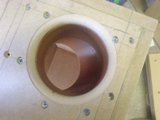
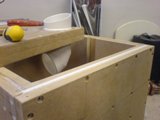
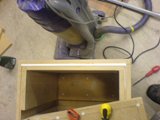
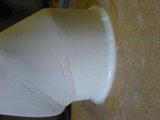
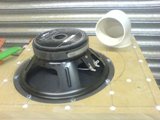
102mm hole cutter 4inch pipe cut Homemade elbow Dust extraction Port entry Pva glue and lots of it Final sealing up P clips
then read on...

About this site
Clicking on any of the small images will open up a larger version in your browser window.
(try on some of the examples above)
I hope you like the site and enjoy reading about my little project.
The site is deliberately quite simple in its design, I think this makes it clean and easy to read.
I didn't use anything other than good old notepad to design this site.
Dreamweaver is great - but you don't need it...

Design
Subwoofers are great in my opinion, they mean you can choose nice small speakers that don't take over the lounge, and then hide a subwoofer behind the sofa!
This is fine unless you end up with a massive subwoofer, which won't fit behind the sofa!
To me, this kind of defeats the object a little.
The subwoofer I've designed and built here is the very smallest sub I could build, and I've used a number of quite innovative ways to keep the size to an absolute minimum.
Even though it is very small (a cube with side of 15" or 400mm) it packs quite a punch and is able to take a sustained 300Watts RMS!
This site explains (in some detail) the entire design and construction process from start to finish.
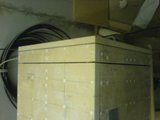
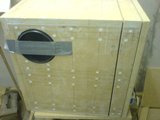
Just in case you cannot wait that long, here are some pictures of the finished article:

Nuetrik cable P clipped wires ...need more here

Why 6th Order?
One of my main reasons for choosing this type of subwoofer was that I don't particularly like the look of conventional ported or sealed box subwoofers.
The idea of a massive speaker cone looking at you, and the potential risk of it getting damaged is just not ideal in my mind.
Plus some of them are just plain ugly! (in my opinion)
I'd much rather see a nice clean looking box with just one large port cut into it.
If I can locate the speaker(s) inside the box then I think that's preferable.
That means that I have to build either a 4th or 6th order subwoofer (as these are the ones with the cones on the insides)

A 4th order sub is arranged as in the diagram below:
4th order sub

You can see it is a driver with a sealed chamber to the rear, and a ported front chamber.
The low-frequency speaker driver is located between separate acoustic compression chambers.
As each speaker cone moves, it excites air in the chambers.
Trapped in the chamber, this air acts as an acoustic spring, which interacts with the air in the port to produce more efficient low-frequency sound.
The system is more efficient and requires less cone motion, which in turn produces less distortion.
In the event that any otherwise audible distortion is produced, the design traps it inside the acoustic chambers so it never enters the room.
Advantages

  • More efficient system within its bandpass.
  • More control over cone movement.
  • Less audible distortion.
    (There isn't a true reduction in distortion, but any distortion that is present from the driver can't be heard due to the chambers acting as filters)
Disadvantages
  • Combined volume of both chambers may result in large overall enclosures.
  • Very difficult to design properly. You may have to experiment for months before getting this design to sound acceptable.
  • Results may vary substantially due to misalignment of both front and rear chambers as well as tuning frequency of each chamber.
  • Drivers can be easily blown due to high compression factors causing lowered cone motion and thereby exceeding the thermal limits of the driver before exceeding its mechanical limits.
  • There are no exact parameters or calculations for designing 6th order bandpass enclosures due to the patent owned by Bose. So if you build one, you're basically on your own.

Why Isobaric?
I'm building a 6th order bandpass subwoofer here, they conventionally are arranged as follows:
6th order sub

However in an isobaric configuration the baffle has two speakers mounted on it, they are arranged face to face effectively forming an enclosure with a small cavity of air between the two drivers.
isobaric loading

The drivers therefore must operate out of phase with each other (or else they would cancel out each others motion).
In an isobaric configuration the layout is like this:
6th order isobaric

Disadvantages

  • The cost of drivers is doubled as you need 2 rather than 1.
  • Efficiency of the system is down by 3dB as compared to a single driver due to the added cone mass.
  • When you compare isobarics to a system which houses two drivers each in their own enclosure, this system would actually be 6dB less efficient.

Advantages

  • Distortion is reduced.
  • Sonic bass response is improved.
  • Bass is claimed as being tighter, faster, more accurate and more pure.
  • Best of all doing so halves the Vas of the driver, so the enclosure size required is halved also. Meaning we can build a really small subwoofer. Being small is a great benefit, the sub won't take over your lounge or car boot which is a bonus!
  • Panel sizes are smaller, so it's easier to build a really sturdy box, i.e. one that is less likely to resonate.
So in a nutshell you would choose an isobaric configuration where:
  • Size is a big issue.
  • When you want the box to be very small.
  • Where more accurate bass is important
  • And if you have a hefty amplifier with plenty of juice to spare.

Why Bandpass?
The main advantage of a bandpass subwoofer is that you need no external filters or crossovers for it to function correctly.
Provided you have an amplifier capable of driving the lower impedance created by connecting the subwoofer in parallel with your existing speakers, then that is all you have to do - no additional amplifiers, filters etc...
Simple!

Why Series Tuned?
This is more necessity than choice really...
The maths behind subwoofer design can get pretty complex, but one thing never changes.
That being that to tune a volume of air to a certain resonant frequency you need to use a port of a certain length and cross-sectional area.
The lower you want that frequency to be, the longer the port must be, and this can get you into difficulties when trying to design a really small box (as I am doing here.)
You eventually get to the point where the port physically won't fit inside the box, i.e. it is longer that any of the dimensions of the box.
You can reduce the length of the port by making it narrower, but doing so can cause other problems such as wind noise or turbulence if you go too small.
With a bandpass box like this, you tune the two chambers to two different frequencies (50 and 80Hz in this case.)
Tuning a 16 litre enclosure to 50Hz needs a fairly long port if you are using 75mm tubing, and it physically won't fit into the box.
Reducing the diameter of the tubing lower than 75mm means that we start to approach air speeds that cause turbulence and noise.
So we are stuck, but the good news is that a series tuned box actually uses both ports combined to tune the inner chamber.
so the length of the inner port can be reduced as the length of the external port forms part of the inner port's effective length.

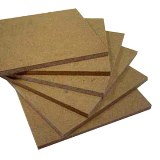
Why MDF?

mdf

Lots of reasons really, it's cheap, easy to work with, very uniform, very dense.
To be honest it's probably not as good as really high quality birch ply, but cabinet grade ply is really expensive.
It's also not as good as concrete, but that is really hard to work with.
I know this from experience as I did try to build a subwoofer by epoxying concrete patio slabs together a while ago and it was a disaster!
So MDF is an acceptable compromise in my mind between cost and performance.
That said, providing the volumes are observed, there is no reason why this subwoofer couldn't be built from any material, even concrete!
(Please feel free to email me if you are planning this, and I'll give you the benefit of my earlier misfortune!

Port Size
To tune a volume of air to a certain frequency you can use any diameter tubing you choose, however the wider the tube is, the longer it will have to be.
So the obvious choice is just to use a nice short thin tube.... Right? Wrong!
As mentioned above, due to the volume of air being moved, too narrow a tube can cause wind noise because of turbulence within it.
The wider the tube is, the less noticeable this effect is as the air speed is reduced, but wider tubes need to be longer...
Which may mean they don't fit inside the enclosure.
So you have a kind of catch 22 situation...
Opinions vary as to an acceptable maximum for velocity. WinISD recommends 17 metres/sec, but I found that with my earlier subwoofer efforts, I could still hear some turbulence on the peaks when using unflared ports.
Dropping the speed to 10m/s fixed the problem, so that would be my suggested maximum.

The maths behind it is as follows:
The port length required to tune a volume of air to a specific frequency can be calculated by using the following equation:
Lv = ( 23562.5 * Dv ^2 / ( Fb ^2 * Vb )) - ( k * Dv )

Where:
Dv = port diameter (cm)
Fb = tuning frequency (Hz)
Vb = net volume (litres)
Lv = length of each port (cm)
k = end correction (normally 0.732)

The value for k, the end correction, can be fine-tuned by using the following values to derive the appropriate end correction figure for each end of the port, then adding them together:
Flanged End: 0.425
Free End: 0.307
e.g. if both ends were flanged:
k = 0.425 + 0.425 = 0.850
if one flanged, one free:
k = 0.425 + 0.307 = 0.732
Normally, k=0.732 is assumed

Minimum Port Diameter
To calculate the minimum diameter of the port required to prevent port noises, you will also need to know the following:
Xmax = maximum linear displacement (mm)
Dia = Effective diameter of driver (cm)
Np = number of ports

You can calculate the minimum port diameter from the following equations:
Sd = pi * ( Dia / 100 ) ^2 / 4
Vd = Sd *Xmax / 1000
Dmin = 100 * ( 20.3 * ( Vd ^2 / Fb ) ^0.25 ) / Np ^.5
where:
Dmin = minimum port diameter (cm)

Note: You CAN use ports that have a smaller diameter than that given by the equation above, especially if the ports are flared at both ends. However, at higher volumes, you may notice some port noise caused by the air rushing through the ports.
Needless to say, the actual shape of the port is irrelevant, once you know the minimum diameter of a circular port, you could very well calculate the cross-sectional area and then make a square port of the same cross-sectional area.
Sometimes the required port tube is too long to fit in the enclosure.
There are other options to maintain the port area and tube length, the port tube doesn't have to be straight.
If necessary the tube can be bent in order to fit the tube inside the enclosure. However when be sure to measure through the centreline of the port in order to determine the effective port length.
Additionally, remember, the open ends of the port tube must have room to "breathe".
The port openings must be placed at a proper distance from any surface; inside the box or out.
The proper distance should be equal to or greater than the radius of the port opening.

Theoretical Modelling
The subwoofer response required is dependant on the frequency response of your speakers.
My subwoofer is going to form part of my home cinema setup, so I want to match my sub with my front speakers (JPW Gold Mini Monitors.)
To bolster up their poor low frequency response and to match their high efficiency, I need something along the lines of this:

Expected response

In an ideal world, the peak above would look more flat at the top, but as it is the product of two tuned air volumes there will always be an element of peaky-ness to it.
The most important thing really is that it goes nice and low, and also that the high frequency roll-off matches the way my other speakers roll-on

It is said that coupled cavity speakers are very dependant on accurate construction, this certainly is true.
The simulation below shows the effect of changing the volume of the two cavities by only 1.5 litres each:
The first plot is both volumes at 16.5litres (normal)
The second plot increases externally ported chamber volume to 18litres
The third plot increases the internally ported chamber to 18 litres
The final plot shows both chambers set at 18 litres

16.5litre vols Change ext volume Change int volume Change both

Here is a graph showing the overall effect of these minor volume changes:

vol changes

Changing the volume of the chambers at the same time (keeping them the same size) also has an effect:
The first plot is both volumes at 16.5litres (normal)
The second plot decreases both chambers to 15litres
The third plot increases both chambers 18 litres

Normal Vols Smaller Larger

Here is a graph showing the overall effect of these simultaneous minor volume changes:

The effects of changing the low frequency ports resonant freqency are as follows:
The first graph shows the res. frequency set to 45Hz
The second graph shows the res. frequency set to 50Hz
The third graph shows the res. frequency set to 55Hz

Res freq 45Hz Res freq 50Hz Res freq 55Hz

Here is a graph showing the overall effect of these low frequency port changes:

Freq sweep low

The effects of changing the high frequency ports resonant freqency are as follows:
The first plot shows the res. frequency set to 75Hz
The second plot shows the res. frequency set to 80Hz
The third plot shows the res. frequency set to 85Hz

Res freq 75Hz Res freq 80Hz Res freq 85Hz

Here is a graph showing the overall effect of these high frequency port changes:

Freq sweep high

The effects of changing the low and high frequency ports resonant freqency are as follows:
The first plot shows the res. frequencies set to 45Hz and 75Hz
The second plot shows the res. frequencies set to 50Hz and 80HZ
The third plot shows the res. frequencies set to 55Hz and 85Hz

45 and 75Hz 50 and 80Hz 55 and 85Hz

Here is a graph showing the overall effect of changing both high and low frequency ports together:

Freq sweep both

The reason I've shown these simulations is that it gives an idea how the response of the subwoofer can be tuned after construction.
If, once the response of your real subwoofer has been measured, you decide need to change it a little, then ports can be easily shortened and not quite so easily lengthened.
Even chamber volumes can be changed by either fixing objects inside to reduce volume, or increased by adding wadding.

Choosing a loudspeaker
I chose the Eminence Beta 10 loudspeaker (well a pair of them)
It's an 8 Ohm 10 inch bass driver, and is fairly easily obtainable for about £40 each,
It's rated at some 250watts and is quite sensitive at 97dB (1W/1m)
The important information (required for the box calculations) are called the Thiele-Small Parameters.
These are detailed below:

Thiele-Small Parameters

Parameter Value
Resonant Frequency (fs) 53 Hz
Impedance (Re) 5.75 ohms
Coil Inductance (Le) 0.67mH
Electromagnetic Q (Qes) 0.52
Mechanical Q (Qms) 8.14
Total Q (Qts) 0.49
Compliance Equivalent Vol. (Vas) 60.1 Liters/2.12cu. ft.
Voice Coil Overhang (Xmax) 3.0mm
BL Factor (BL) 9.6 T-M
Surface area of Cone (Sd) 0.03449m2

If you like graphs (I like graphs) then you'll like this one, it's the frequency response of said driver:

Beta 10 response

Determining the Box size
The reason behind using an isobaric loading was to reduce the box size with all the associated benefits such as a more rigid box etc...
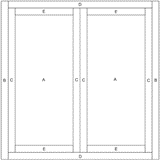
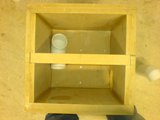
So here the intention is to keep the volume as low as possible. Below is a diagram of exactly how the completed box will appear from above, you can see that the box is perfectly square in plan view as it is a perfect cube, and also that both chambers/cavities are identical in size.

Cutting plan

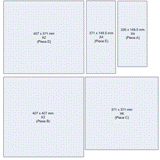
If you are planning on building this subwoofer, then you may find the diagram below of use, it shows the panel sizes and quantities required to build this enclosure.

Cut list

Construction
Construction starts with measuring and cutting the MDF.
My design with its double skinned walls does require quite a few panels - 18 in fact, and to ensure we end up with a rigid and airtight box the cuts must be very accurate.
Ideally for this task you would use a tablesaw - we are looking to achieve accuracy of panels to better than 1mm.
This would take some doing (or at least a lot of plane work and sanding) with a handsaw or a circular saw.
This first stage of marking out and cutting is very important (and a little boring) but it cannot be rushed.
The end result really does depend on how accurate these panels are cut, so measure twice, cut once, take your time etc...
It will pay dividends later.

Now, after all that harping on about having a table saw, I don't actually have one!
Nor do I really have the room for one, so I made one for this project.
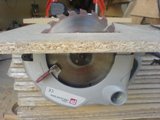
Below is a picture of my attempt at a low budget and fairly high accuracy table saw:

DIY table saw

You can see that it is just a common circular saw fixed to the bottom of a piece of chipboard with the blade protruding through a slot.
There is no safety guard and so it is potentially dangerous, I was especially careful using it!!
It was surprisingly accurate though, the results are great.
You can see on the second picture how a piece of MDF with a nice straight and square factory edge on it made for a good guide fence.
I simply clamped it to the chipboard using a couple of woodworking clamps and a couple of woodscrews for good measure.

Table saw

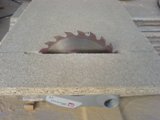
Here is a close-up of the blade protruding through the table.
Once set up and secured I spent a bit of time with an engineers square making sure the blade was perfectly perpendicular to the table.
Once I was happy I made a few test cuts...
Adjusting the fence for each cut was a bit of a faff, but my design only calls for 4 different dimensions.
So it doesn't need too much adjustment.
I would recommend making all the largest cuts first (407mm), then next cut the next size (371mm), then the next (335mm) etc..
Doing it this way means that even if your measurements are slightly off, at least all the cuts are the same which has got to be a good thing.

Circular blade

This is probably a good time (as Norm Abram would say) to talk about shop safety!
MDF is horrible stuff, so make sure you are working in a well ventilated area, wear a dust mask if you have one, and if possible rig up some kind of dust extraction.
Given the relative danger of the circular saw table contraption and the nasty MDF dust, it's probably wise to keep children and animals away while you are cutting - they can help later.

You will need a fair few tools to complete this project, below is a sample of some of the most important ones.
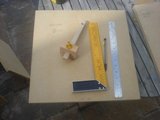
A good steel rule is absolutely necessary for marking out and also for checking that edges are straight
The engineers square is very helpful when assembling as well as when marking out.

Some tools Holesaw 102mm

Cutting all the wood up will take some time, there are 18 pieces in total, and if you build your box the way I've built mine then you will need:

2off 407x407mm
2off 407x371mm
6off 371x371mm
4off 335x149.5mm
4off 371x149.5mm

You'll need almost a whole 8'x4' (2440x1220mm) sheet of 18mm MDF for this, but they are very difficult to handle and transport as a whole sheet.
I tend to have them cut at least in half at the shop and this makes transportation and handling much easier.
Because I'm not the best woodworker in the land, and because we really are hoping for high accuracy here, my method is normally to deliberately cut the panels slightly too large and then sand/plane down to fit.
Of course everyone has their own way of working, but this works for me.
The way I work is to mark out using a very thin clutch pencil with a 0.7mm diameter lead, this makes for very thin lines.
I mark out the shapes I need to cut as accurately as I possibly can, once I've marked them, I re-measure and if they look slightly out I do it again.
When I am happy I'll start cutting. The cutting is the key to this system...
Ideally you would normally cut the wood such that the lines that mark the shape are just removed by the cutting blade, I don't, I'll deliberately leave the line which means that if I'm accurate the shapes will be roughly 1.4mm bigger than I need. Once all the shapes are cut.
I'll remove the slight excess using either course (80grit) glass paper if I'm quite close to the line.
Or a plane if the excess is more than I fancy sanding off - once the pencil line has disappeared, your panel is the perfect size.

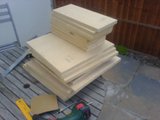
Once all the cutting and sanding is done you should have a nice pile of panels

Woodpile

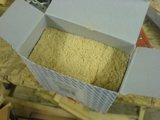
...and probably a huge pile of sawdust. Don't throw it all in the bin, I like to keep a small amount for later, as when mixed with wood glue it does make a nice bit of filler for screw holes and maybe the odd gap or two(!)

Sawdust

Don't be afraid to re-measure at this time, and also don't be afraid to put all the similar panels together and make sure they really are all the same shape and size, notice that I like to mark the panels, I tend to write the sizes on them, especially where you have lots of similarly sized panels.

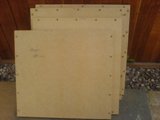
At this point we are almost ready to start some assembly, I like to glue and screw the joints, and as this is MDF it is sensible to drill pilot holes to stop the wood from splitting when fixing into the ends, I used 2.5" number 8 woodscrews for the assembly and as I intend to finish the enclosure to a fairly high standard I have counterbored the screwholes so I can fill over the heads. Don't be afraid to use lots of screws for this. Below are some panels that have been drilled ready for assembly:

Finished panels

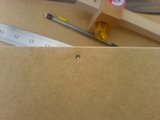
A minor detail, but a fairly important one I think is to ensure that the rear of the holes are also suitably dressed, I normally slightly drill out the back of the hole just to make sure the panel fit isn't affected by stray bits of wood etc..

Tidy screwholes

As I said before, my woodwork really isn't the best, but I am pleased with the results I achieved here, below are some pictures of the inside of the first skin of the box, and you can see how nicely the panels fit together, the fit isn't perfect - it never will be, but the gaps are narrow enough that the glue (I used a fairly thick PVA woodglue) easily fills any minor gaps.

Nice gluelines

Using plenty of glue is key to a good strong assembly, ideally the woodglue will ooze from the joints when the screws are tightened and should form a continuous bead - which is a good indication that enough glue was used. When gluing I tend to use small paintbrush and coat both mating surfaces with glue.

More glue Glue brush

Once assembled though I don't think it hurts to brush just a little more glue into any remaining gaps, I try to get the glue as deep into the gaps as possible using a wallpaper scraper to push it in under pressure

Filler glue Gluefiller Glue filler

Once you are happy that the gaps are full, remove any excess using a scraper or a wet rag, remember you are trying to leave as little excess glue on the surface as possible, especially for the first skin of the box, you don't want dried excess glue between the two panels - that will surely lead to vibration problems later on. Once you have scraped the excess away, it should look like this

Panel fit

The good thing about building the box in two stages, is that you get two opportunities to make sure it is totally airtight, the picture below shows the completed first (outer) skin of the box complete and the start of the second (inner) skin.
Again particular attention is made to ensure that the joints around the edges are well sealed and plenty of glue is used.

Panel gluing Edge gluing

Once glued, you'll need plenty of screws to hold the inner and outer skins together, like all the other screw holes, make sure they are suitable recessed and even though they won't show on the finished item, arrange them in nice straight lines.
The usual rules apply here, take your time, and don't be afraid to use lots of glue and screws.

Markout lines Bottom screws Neat screws

If you can, try to get some assistance with the assembly, at times it's helpful just to have another pair of hands to hold things in place

Assistance

Just a quick point on the assembly, remember we are trying to make as rigid and acoustically dead object as we can.
That means that any opportunity to prevent movement of the panels should be taken, in the picture below you can see we are fixing into the side of one of the inner skin panels, these panels are already fixed together by screws coming through from the adjacent panel, but fixing to it from both sides makes for a stronger box, so we do it, screws are cheap....

Extra screws

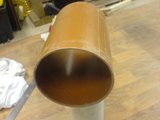
In the image above you can see the start of the external port, as discussed previously I think the best size to use is 102mm (4") diameter soil pipe
I used the stuff designed for underground use as I think it is slightly stronger and has a thicker wall, which should stop some stray vibrations.

Chamfer

The port mounting arrangements are fairly complex and my preferred method is to drill two different diameter holes in each of the skins.
The outer skin gets a hole with diameter 102mm (which matches the internal diameter of the tubing used.) The inner skin gets a hole with diameter 106mm (which matches the external diameter of the tubing used.)
I happened to have a 102mm holesaw so cutting the external hole was easy and the result was quite neat, however I don't have a 106mm holesaw so was forced to cut the internal hole with a jigsaw and then tidied it up with some glasspaper - the results were quite pleasing, MDF really is quite easy to work with, just leave a little excess and sand it away later.
The pictures below show the outer hole (102mm) and also the few additional screws around the perimeter.

Port hole Port closeup

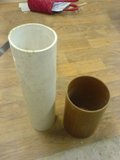
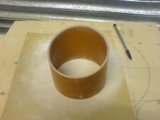
These pictures show the tubing used for the subwoofer project, the smaller (75mm) tube is used for the inner port

Pipe sizes

And finally here are some pictures of the internal hole, you can see here that it is bigger on the inside, so that it can receive the pipe in the socket that has been created by the two different sized holes.

Port Inside Inside close

Mounting the baffle permanently is probably one of the last things we will do, particularly if (like me) you intend to measure the response of your sub and tune the port lengths accordingly. This is ok though, the design of my box is such that the central baffle board is held quite firmly in the central slot without the need for screws or glue.
In the picture below the baffle has already been laminated from two pieces of MDF and at this stage the port hole or the one for the drivers hasn't been cut.

Baffle

You can see that the box is now starting to look really solid, the double skinned walls joined with lots of glue and screws are really very strong and by this stage the box is starting to get quite heavy, and we haven't fitted the lid or the drivers yet!

Comfy

Getting back to the baffle fitting, here is another view of it fitted temporarily, eventually this will (like all the other panels) be glued and screwed to within an inch of its life, but for the time being I've just dropped it into place to check for fit.

Side view

The inner port calculations reveal that the port must be 271mm, this is fairly tight considering that each chamber is just 149.5mm wide plus 36mm for the centre baffle giving a total of 335mm
Assuming we arranged the port so that it was centred on the baffle that would only leave 32mm at each end (less once we fix some wadding/sound-deadening at each end)
It is generally accepted that the ideal is to leave at least one port radius between the opening of the port and any surface. Unfortunately with a straight port located tight in the corner we can't achieve this, so the plan is to bend the port a little.
I suppose it doesn't really matter how you do this as long as some attempt is made to maintain a fairly uniform internal cross section.
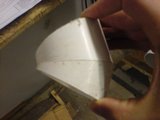
I did try on a number of occasions to heat and then bend the plastic pipe, but with little success.
My second attempt was far more successful, and some examples of it are below:

Pipe mitre New cuts Pipe side

Once the pieces are cut, they need a bit of tidying up with a file and I gave them a quick run over the orbital sander to ensure the edges are square and flat.
Below are images of some of the pieces, in terms of dimensions, I've cut the angle at 75degrees and the short gap is 5mm. To be honest this isn't too critical, as long the pieces are the same, but the shorter the pieces are, the tighter the bend will be.

Pipe top Example fit

Like any sort of gluing exercise, the key is to match what you are gluing with the glue, I've never had much luck when using random glues, in the case of my 75mm rainwater pipe, the glue to use is a solvent weld type and ideally spend a while getting the mating edges as close and clean as possible. I took my time and glued a section at a time leaving plenty of time for each section to dry before starting on another.
Below you can see the method I used to get the tube edges as flat and square as possible, you could just as easily use an orbital or even belt sander to do the same, I just used some reasonably tame sandpaper (120grit) on a flat surface and rubbed the tubing back and forth on the paper until it was suitably flat.

Joint facing Joint face

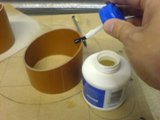
Before gluing, it is worth spending some time ensuring the pieces are clean and free from dust, if you have an airline, now is a great time to use it! I used mine to dust the pieces off and generally blast any rubbish away from the joint edges. The glue I used is a solvent weld type adhesive, which is increasingly difficult to get hold of these days, but any large DIY shop or plumbers merchant should be able to help, I bought a fairly large pot of it as I like to use lots!

Air line Pipe gluing

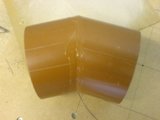
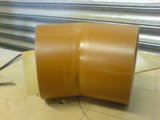
Below are some examples of the joints glued up.
The instructions on the packaging say leave it for a full 24hours before use, so I did, but the glue itself seems to 'take' after about 10-15secs and after this time it is quite able to support its own weight, I left it about 10 mins and then painted another coat of glue around the inner and outer edges just to be sure, I was reliably informed by a friend that this stuff is fairly good at filling gaps too, so I made sure I pasted loads of it on (I can always sand it back later)

Glued joint Glue joint side

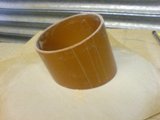
The gluing for the thicker (4 inch) pipe is much simpler than that for the thinner (3 inch) pipe, there is just one small bend in the thicker pipe of 30degrees.
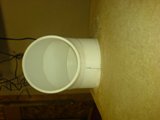
The thinner pipe (as you can see below) has multiple joins in it to form two 90degree elbows made up of 3 glued joints each, this part has to be done in stages, i.e. glue one piece, let it dry, sand back if necessary, then glue piece number two etc... I'm really quite pleased with the results

Port elbow Port top

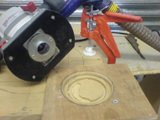
The inner/thinner port has to pass through the central baffle board, and so to do this is is necessary to make a 84mm (ish) hole in the baffle, there may well be a hole cutter out there that is 84mm diameter and can drill 36mm deep, but I don't have one - I do have a router though, with a template following collar on it, so I used this. Interestingly, using a 9mm straight cutting bit and my standard collar fitment required a 102mm template, which I was able to easily cut with my 102mm holesaw (result!)
The first step (as always) is to mark out the area you are preparing to cut. Obviously as the baffle drops into a rebated area in the box we can't go right to the edge, so I simply dropped the baffle temporarily into place and marked out where the free area was. You can see that I had to remove a couple of screws from the baffle board where they would have obstructed the router bit.

Inner port

The next step is to set up the router, I'm not usually a big fan of goggles, ear defenders, breathing masks, steel toecapped boots, protective gloves etc... etc... and even cutting MDF I tend to not bother providing there is suitable ventilation, but in the case of routing MDF, I always wear a mask as the dust is just horrible, on this occasion I also hooked the router up to my garage vacuum as this helps to keep the dust down and improve visability.

Router setup Router dust extraction

I don't have a massive router, just a quarter inch one, so when cutting a thick dense material like this, you have to take it in small plunges, which I did, the picture below shows plunge number 1 and the template used to cut the hole

Hole template

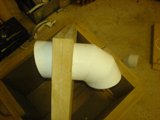
Once cut and tidied up, the pipe prepared earlier needs to be fitted through this hole, I used some 'no more nails' to secure it initially, and then packed any small gaps around the circumference with decorators caulk, once painted this will be finally sealed with a bead of silicone sealer.

Baffle pipe Elbow inner Pipe through

While I had the router out and set up, I decided to also roundover the external port, I used a 12mm rounding over bit with a bearing follower to cut this edge, again take it slowly and I did it in two passes to ease the strain on the cutter and motor.

Round over bit

The results are quite pleasing I think, in time this edge will get a coat of paint anyway, but even without it makes the port look more finished and in any case the main reason for chamfering the edge is to reduce air noise through the port.

Port round over

It's almost starting to look like a real subwoofer now! The pictures below show the port fitted into the box and shows how the two different diameter holes work together to give a nice transition between the tubing and the hole, when it's all painted the same colour the join should be invisible.

Outer port Port outer

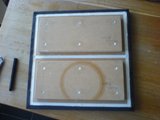
I plan on spending some time tuning this sub, and this will require quite a few iterations of modifying either the port lengths or the amount of acoustic wadding and then retesting with a microphone and frequency generator, between each test it'll be necessary to refit the lid. So for this reason removing and fitting the lid must be fairly easy to do. My intention with the lid is to use the router to form a small groove in which I can form a rubber gasket of silicone sealant which will make an airtight seal when compressed. The lid itself is made up of three pieces of MDF, the actual square top piece, and then fixed to that two smaller rectangles that will fit into the cavities. The pictures below show the sort of tight fit we are looking for, the mdf itself doesn't have to form an airtight seal, but at the very least the fit should be close fitting enough that the pieces have to be pushed into place and that the frictional force created by this can support the weight of the pieces and hold them firmly in place.

Lid test fit

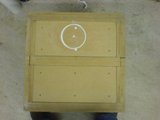
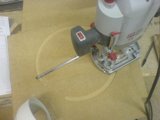
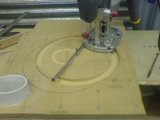
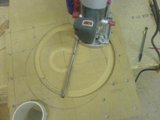
Cutting the baffle for the drivers was really interesting, and to be honest was my first attempt at some serious routing. I set the router up with a homemade circle cutting jig and set to work. You can see from the pictures below that I should have cut the hole before mounting the inner port, as once fitted it does obstruct the router, so I was unable to cut the complete hole and driver rebate.

Driver routing

I needed to both cut a rebate on both sides to set the drivers into (remember we are trying to make the volume of air between the drivers as small as possible) I set the depth to 10mm, leaving 16mm to fix the drivers too. From the pictures below you can see how I set the centre of the circle by drilling a 4mm drill bit in and then using this to pivot the router around, I was then able to fine tune the radius/diameter by sliding the router along this rail, this also allowed me to make the rebate in two passes rather than over stressing the router with a monster sized cutting bit.

Driver hole Top routing Side routing

The final stage is to actually do the through cut, my router doesn't support quite a deep enough plunge cut, so I had to cut from both sides (by simply sending the centre point drill bit all the way through. Of course the resulting cut isn't quite as neat, but a quick run over with some sandpaper sorted that out.

Driver cut Top cut Thru cut

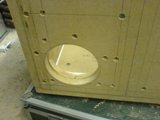
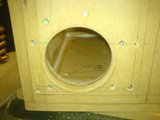
Below is the final piece cut out ready to accept the drivers, the last job will be to drill out the 8 holes for the mounting bolts, which I'll do when I've taken delivery of the speakers (damn postal strike!)

Finished cut Side finished cut

I've been looking forward to this bit for a while! ;-)
I want this lid to be removable for the purposes of tuning the enclosure, so there needs to be some kind of airtight seal where the lid meets the box, my plan was to route out a semicircular groove using the router and then apply bathroom silicone to the groove to form a gasket - I had no idea how well this was going to work out!!
The pictures below show the initial groove.

Groove cut Groove side

Next I used some aluminum angle with to form a channel into which I spread some silicone, there is no need to be particularly tidy here, as the next step is to smooth it out with a thin scraper.

Gasket template Gasket smoothing

This leaves you (once the silicone has cured) with a gasket about 2mm thick and set into the semicircular groove, I'm doing one side of the square per night, but if you had enough aluminium you could do the whole lot in one go.
Silicone is amazingly sticky, so I used a stanley knife to release it from the aluminum angle once it had cured. I'm really pleased with the results!

Finished gasket Long gasket One gasket

Now I have cut the hole for the loudspeakers, I decided to finally seal the inner port into place using some more silicone and a handy tool I have, you don't need one (nor do I know where mine came from) but you have to agree it does give a nice tidy finish. (even if no one will ever see it!!)

Pipe seal Silicone tool Tool side

The drivers finally turned up today!!! We had a postal strike here and so they were delayed a little, but they were worth the wait!

Driver in box

Because I was so excited about their arrival, I decided to test mount them on the central baffle board. They are mounted with 45mm M6 bolts, nuts, washers and locking washers, they will probably get removed, sealed and refitted before final assembly, but here are some pictures of one of them mounted in the baffle.

Mounted driver Driver mounted

You can see that they fit quite nicely into the rebate I routed out, and that I've used the largest diameter bolts I could to hold them in place, the mounting holes in the drivers are 6mm diameter, so I used M6 bolts, it is a tight squeeze, but at least they are held firmly in place.

Pole piece

The baffle is starting to look almost complete now, one side of the port is complete and fully glued - the other will have to wait until I start tuning as the final length may need adjusting, you can also see that the screwhead holes have been filled in

Baffle screwside Driver and port

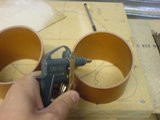
I took this opportunity to measure the diameter of the tubing, really it's the internal diameter that we are after, my original calculations for the port lengths were based on an approximation of 75mm, in reality the tubing has an internal diameter of 75mm!! So on this occasion no modification will be necessary!

Tube diameter

Below are some shots of the partially completed baffle, you can see the port taking shape and the hole drilled or the cable and socket.

Port top Baffle port complete

Here is a test fit of the baffle and in the completed box, no reason really, just wanted to make sure I hadn't done anything stupid and that everything fits together nicely (which it does)

Driver baffle Isobaric baffle

Bracing, I like the idea of strengthening the box where possible, so where they can be fitted it's a good idea to brace the corners with MDF braces, drill them out as much as possible to reduce their volume but think of maintaining strength too, below are some pictures of my attempt at this. I fitted braces, just 30mm wide pieces of 18mm MDF screwed and glued to the side of the box (these panels are the longest and so I felt some additional bracing was in order - the general opinion seems to be that any panel over 300mm long should be braced)

Driver protection

The pictures below show the exit port finally fitted into place, notice I used a small squirt of silicone to hold the port away from the side of the box, it is of course also glued into the port hole recess. I've taken advice here and arranged the port so that it's opening in the box is as far as possible from the inner surfaces, this will (I'm told) avoid port noise.

Box exit Exit port fitted

I used anti-vibration washers, but once you see these drivers moving, you appreciate that any attempt to stop the effects of the vibration must be a good thing, so I took the precaution of smearing some more silicone on the exposed screwthreads.

Threadlock

The bottom of the enclosure is quite a critical and complex piece of work, you can see from the pictures below that the first part of its construction is forming a matching gasket to the ones we've made along the edge of the enclosure. I used the router to remove a half round 9mm groove and then filled it flush with silicone using a flexible spreader to smooth the silicone flat.

Lid gasket Lid groove Gasket fill

Once this is done and has cured, the next job is to fix the two rectangular plugs into place that will drop into either side of the enclosure. These are quite a tight fit (they should be) and so you do need to be accurate when fitting these, I simply placed them into the two sides of the enclosure, they were held in place by the friction of the fit (see below)

Lid fit

Then applied plenty of glue to the top of the rectangles. I then placed the base on top and once I was happy it was in the right place I put a few screws in to hold in and then checked that all was well before finally screwing it into place.

Base screws More screws

The finished base fits really nicely, into the rest of the enclosure, the gaskets mate together well and I think once I put some screws in (more about how I'll do this later) it should form a really airtight and vibration proof fit, whilst at the same time being quite easy to remove for the purposes of access and tuning the pipes etc..
In the picture below I'm just in the process of caulking up the countersunk holes.

Complete base

This next step is (I think) really quite important, MDF is a pretty nice material to work with generally, but screwing into its 'endgrain' is a poor way of fixing, MDF is effectively just sheets of paper bonded together with resin and it splits almost as soon as you tighten up a screw. This isn't that noticeable if you are just using the screws to hold pieces together while the glue dries, but in the case of the box bottom which will be fix and then removed many many times during the tuning process, this just won't do.
My solution is to make a thin (~ 2mm wide) groove all the way around the perimeter of the box. I couldn't find a router bit long and thin enough to do this, so I just used a circular saw with a standard wood cutting bit and the depth set to 18mm - so we are only cutting through one of the two skins of 18mm MDF.
Note: notice how I have the port covered over with a blank and also the base in place to avoid fitting the sub with dust.

Metal cut Cut port

Once you are happy with the groove you've cut, tidy it up with sandpaper and then you can fit into the groove some thin metal bar (I used 16mm x 2mm mild steel) try to get a nice overlap on the corners (you'll see why later) and glue in place as well to avoid any potential vibrations - I used No-Nails.

Metal cut Glued bar

In the interests of getting a really nice finish and as I didn't want the metal bar poking out past the MDF, I used an off-cut of MDF as a temporary clamp to hold the metal in place while the glue goes off.

Temp clamp

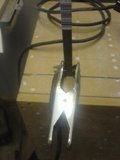
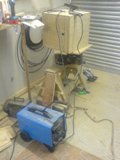
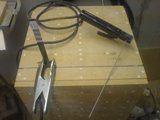
Once all the pieces are cut and glued in place, I decided to weld all the pieces together to add strength and also to ensure that nothing is able to move about. It would be difficult to get the clamp in to the narrow groove, so I just wedged a metal off-cut in place so I could attach my welder.

Electrode

The reason for all this effort is that we can now use the metal ring as a method of fixing the removable bottom on to the sub enclosure, I plan to drill and tap threads into this metal bar and then bolt the bottom in place through the metal ring, this way repeatedly fixing and removing the base won't be a problem.
If you haven't got a welder (or access to one) I expect you could glue the metal together, or maybe mechanically fasten it in some way, but I love welding, so frankly any excuse to get the welder out, and I do.

Welding setup Arc welding Smiley

This really is quite a scary procedure though, you take a subwoofer that is nearly complete, that you've spent hours (probably a hundred hours) painstakingly building and then try to set fire to it!! Please, if you decide to weld the metal, have a bucket of water handy!

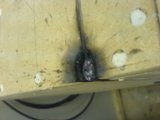
Fire Crater

Immediately after welding, it does look a bit rough to say the least, but once I had chipped the crusty bits off the welds and filled in the mini craters it didn't look too bad, and best of all we are now getting alarmingly close to being finished!

Feet base Feet holes Feet mounted

It's vital not to rush this last stage, so before even considering gluing the carpet to the box, I gave the whole box a good going over with a sharp scraper and some fine sandpaper on my orbital sander, even though I'm carpeting this box and not painting it I still got the wood as flat and smooth as possible.
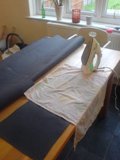
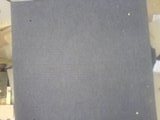
I spent a while trying to find the right covering, lots of people sell 'subwoofer' or 'speaker' carpet, but often it is very course and a bit cheap looking, additionally most of the stuff I saw was black, and really I wanted a dark grey. Anyway, I finally found what I wanted from Maplin here it's more of a cloth than a carpet, but trust me, it's really nice. However as nice as it is, it is/was also very creased, so step one is to iron it. thanks to Jo for the 'ironing using a damp tea-towel' tip! (It worked really well)

Ironing setup

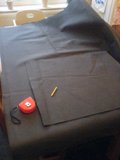
I found that a children's crayon is excellent for marking out on this carpet, so using a yellow crayon and a tape measure I marked out the two pieces I needed to cut, plus a couple of samples for testing on first. I cut a square of about 600 x 600mm for the base and a much larger square of 1500mm x 1500mm for the main unit.

Marking out Crayon

What is the world coming to? You can't even get decent glue anymore! I bought some contact adhesive and it wasn't until I got home that I realised it was solvent-free, which frankly didn't fill me with confidence, but I suppose it does mean you can use it indoors - and it was raining at the time, so I gave it a go.
It's the usual drill, coat both surfaces and then leave for 30mins or so to change colour and go a bit tacky (but dry to the touch) I did a couple of test pieces first, and then had a go at the bottom piece. Because:

  • If I mess it up it won't show as it is on the bottom
  • If I mess it up I'll probably have an off-cut from the other piece that I can re-use.
As luck would have it, I didn't mess it up! (thanks to the test pieces) One problem I did have with the test pieces was that as the carpet is dark grey and a little porous, you have to be careful not to slop the glue on too liberally or else it does bleed through and affect the pile somewhat, so be sparing with the glue!

Contact bottom Contact carpet

It's probably advisable to apply some pressure while the glue dries. The picture below shows the 'clamping arrangement' for the top carpet covering, I didn't have any clamps suitable for this (you'd probably need some ratchet strap type arrangement) so I've just (as you can see) piled heavy stuff on top of it, and left it for 24hours - sometimes simple solutions are the best!

Apply pressure

Once the top glue had dried, you have to pick at least one of the sides to glue next, I chose the side with the port in it, because this is easier than the side with the socket, and the other two sides will need to have mitre cuts to join the fabric. Gluing the second side is a bit harder as you only really get one chance with impact adhesive, once it's touched, it's stuck! I found the best way to do this was to pull the carpet taught and then pull it down over the box, so that once it touches the wood, it's in the right place. Again once in place 'clamp' and leave for a while.

Impact adhesive Carpet glue lines Clamping arrangement

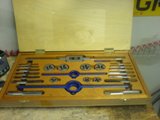
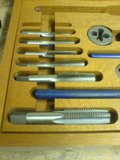
Taps and dies are awesome (in my opinion) I always feel like a real engineer when using them, and I've wanted a set for as long as I can remember. I've only had these for a year or so, and haven't had much use out of them, so any excuse to dig them out always gets a smile from me! If you remember, the plan is to tap threads in the metal band that forms the perimeter of the box and mount the base by bolting it through the steel band.
While the glue was drying I thought I'd try a test hole.... I'm going to use M6 bolts, meaning you need to drill a 5.2mm hole and then tap out the thread using an M6 tap.

Taps and Dies Taps Tap

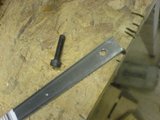
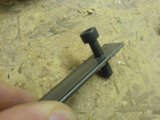
I quite like the look of hex-head bolts, I'll probably use these for mounting the base to the box. Below is my attempt at a test hole, the steel is only 2mm thick, and so the tapping of it is fairly easy, I don't anticipate any problems with the real thing.

Trial hole Tapping Thread cut

Covering the box is going well, and aside from a few gluey finger marks the result is pretty flawless.
Interestingly I've noticed that grey felt-tipped pen is a great way of covering up these little mistakes!
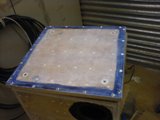
Covering the lid, especially since I want it to be removable is a bit more of a trial - that's why I did the box first (to get some practice)
Here's how I got on:

Top clamp Clamping top Topclamp Sub base

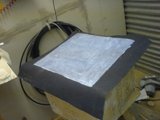
Once the glue is dry, I just cut the excess carpet away to the edge of the gasket.
The lid looks pretty good, doesn't it!
In the last picture you can just see the recessed holes for the optional spikes.

Base corner Finished base Spike holes

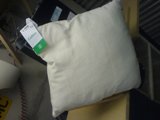
Next I went to find some cheap cushions - I didn't realise how cheap they would be though.
ASDA were doing them for less than 2quid and for some reason I got 20% off as well.
....as soon as I got them home, I cut them up!

Cheap cushion Wadding removal

I had to remove some of the wadding from them as they were physically too big to fit in the box.
Once I had them down to a reasonable size, they went in for a trial fit.

Box loading Wadding More wadding

And after a bit more gluing, the lid was ready to be fitted to the completed box.

Nuetrik socket Finished base

See what I mean about the glue showing? Don't worry, my grey felt-tip will deal with that.
So the subwoofer is finished...
Well, it still needs to be tuned and finally sealed, but it now looks like a finished sub.
After a few days in the garage playing test tones from my test CD, I'll move it into the house and start making some measurements.

Electrics
There isn't really too much to do electrically, just link up the speakers to some kind of external connector.
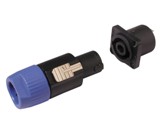
I favour the neutrik speakon connectors, they are capable of carrying huge amounts of current, they lock into place very positively and have the added bonus of being 4 pole:

Nuetrik connectors

Being 4 pole (i.e. having 4 pins) means that I can connect up both speakers separately to the socket giving the choice of wiring them in parallel, series, or best of all to two amplifier channels without having to change the way the subwoofer is wired internally.
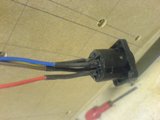
The pictures below show how I soldered and heatshrinked the wiring to the Neutrik socket, 4 wires come out of the socket and into the subwoofer, a pair go to each driver

Socket wiring

A large (20mm diameter) hole was drilled quite close to the bottom of the enclosure and on the opposite side of the box to the subwoofer port, I aligned the hole so that it is in the centre of the box, the plan is to extend this hole into the side of the baffle too, so that the wiring will pass into the baffle and then pop out near to the driver connection terminals.

Neutrik wiring

The image below shows the continuation of the 20mm hole into the side of the baffle, you can see the hole isn't quite in the middle of the box! Ah well! It's close enough for our purposes..

Wire hole

This picture shows the hole drilled in the baffle, this is where the wiring will pop out and connect to the driver (there is another hole the same on the other side, for the other driver) Eventually when complete, the gap around the wires coming through this hole and the remaining space in the socket hole will be filled with filler to keep the enclosure airtight.

Driver nuts

The speakers I've purchased (Eminence Beta 10) have a pretty standard tag board for connecting them up, you have the choice of using either crimp on connectors or soldering to them, given the amount of vibration I think I will solder the connecting wires to these terminals and maybe use some P clips to hold the wires and give a professional appearance (which will make up for the off-centre hole I drilled earlier)

Driver tags

When covering the box with carpet, I intend on making the transition from the carpet to the socket and the port as smooth as possible.
For this reason, I've recessed the mounting hole for the speakon connector into the wall of the box, as shown in the picture below. For this I just drew around the socket and used the router freehand to remove the excess, a few test goes on an offcut to get the depth correct was al I needed.

Socket mounting

The speaker wires come through the baffle and then pop out near to the driver connection tags, the picture below shows the wires connected up. I soldered them to the speaker tags as this is more reliable than crimping connectors on, as always a couple of cable ties and P clips help hold the wire in place, I've also used cable ties to show which wires are +ve and which are -ve.
Notice also the additional hole in the baffle near to where the speaker wire pops through, I've got an interesting use for this later... (!)

Cable Pclips

I was conscious that the gap I had drilled earlier to fit the cabling and the neutrik socket into was a potential weakness in the baffle and also those loose wires in the void might start moving about and cause noise, for this reason, once connected up and tested, I filled the void in the baffle with flexible caulking to fill up and space and also to remove the possibility for any vibration.
You can see from the second picture that once the void is full, the caulking oozes out of the two other holes, neatly filling the gap around the wires! This picture also shows how I've smeared some silicone over the bolt threads to stop the nuts working loose (I've used anti vibration washers too, but just to be on the safe side, you know!)

Void fill Fill void

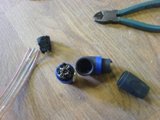
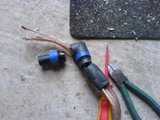
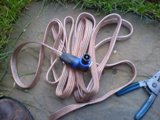
The next job, as testing is drawing near is to make up a connecting lead, I've used a right angled 4 pole neutrik plug, as the look quite neat, and some 4 core 4mm sq layflat oxygen free copper speaker cable, it is probably the largest cable you could get away with using with this plug, so you do have to be careful with the connections or else you'll run out of space

Neutrik parts Right angled neutrik 4 core connect

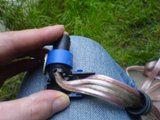
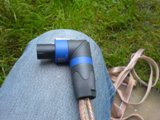
And here is the assembled lead, I think it looks pretty nice.

Assembled speakon plug Speakon lead

Testing
Here is the start of my test rig, it's a large 12v SMPSU, a fairly beefy amp and a CD player for playing test tones. The amplifier is capable of around 120watts RMS into 4ohms when bridged, the subwoofer when complete will be able to take probably double this, but for testing it's fine. I have a much larger home made MOSFET amp capable of 400-500watts in bridged configuration which I'll use for the final testing.

Test rig

REW stufff?

Conclusion
Of course I'm pleased with my efforts, I really did put a lot of effort into this, so failure really wasn't an option!
It's been in the lounge for a few months now and is fairly well worn in, and certainly it makes bangs and bumps at all the right times!
A bit of initial messing around with the levels to get it balanced in the mix was required (I use a separate power amp to drive this one) but once that was out of the way it's been plain sailing really.

Parts List

Item Supplier Cost Quantity Buy
18mm MDF 2400 x 1200mm sheet B&Q £14.95 1
380ml uPVC solvent weld glue B&Q £5.49 1
2metre 4" Underground Soil Pipe ?? £5.49 1
2metre 3" heavy grade rainwater ?? £3.50 1
10" Eminence Beta 10 Loudspeaker ?? £34.95 2 buy
Neutrik Speakon Panel Socket Maplin £3.95 1 buy
Neutrik Speakon Plug Maplin £2.95 1 buy
Speaker covering carpet Maplin £3.49 2 metres buy
2.5mm Heatshrink Maplin £1.59 1 metres buy
Speaker Wadding Maplin £1.49 5 metres
8 x M8 Hex Nylock Nuts Maplin £0.69 1
8 x 2" M8 Bolts Maplin £0.99 2
8 X M8 flat washers Maplin £0.49 2
100 x 2" #8 Woodscrew Tooled-Up £2.50 3 buy
1litre resin W wood glue Tooled-Up £13.05 1 buy
Contact Adhesive Diy Tools £5.69 1 buy
310ml tube No More Nails Tooled-Up £5.80 1 buy
300ml tube clear bathroom silicone Tooled-Up £4.82 1 buy

Tools List

Item Supplier Cost Buy
Makita 14.4v Cordless Combi Drill Tooled-Up £124.95 buy
Bosch Random Orbital Sander Tooled-Up £56.95 buy
Draper 1/4 inch router Tooled-Up £64.95 buy

Useful Links

Software
Flare-It - nice bit of software for calculating port air speed.
WinISD Pro - It's cheating really, but if maths isn't your thing...

Info
DIY Subwoofers - A really nice site, lots of info on the theory of subwoofers.

Suppliers
B&Q - B&Q
Maplin - Maplin
Screwfix - Screwfix
Tooled-Up - Tooled-Up
CPC - CPC

Other / Misc
AV Forums - AV Forums
Speaker Plans - Speaker Plans
FreeFlowMobiles Fancy a new phone? This site is great!
Hackaday - If you like this, then Hackaday is right up your street, featuring a hack (project) every day.
BK Electronics - These guys make some lovely amps and subs
MostlyAudio - A nice site with lots of DIY Audio projects
LANmapper - Understand your LAN/Network Infrastructure
ACTIV8 Information Security
LANreveal Reveal your Network

About
A bit about me...

Comments
If you enjoyed reading about my project, and would like to leave a comment, please do!
I will post any interesting ones below.

Name:
Email:

Stop SPAM - What is 10 + 5?:

COMMENTS:
---------------------------------------------------------------------------
Ross, Bristol
What you've done is marvelous, well done!
Posted: 9:47 10/10/2007
---------------------------------------------------------------------------
Nathan, Bristol
What you've done isn't marvelous, well (not) done!
Posted: 11:37 11/10/2007
---------------------------------------------------------------------------
Mark, Kent
Nice bit of handywork there.
Now all you need to do is post instructions how to fit one into a
Vauxhall Nova!
Posted: 15:43 13/10/2007
---------------------------------------------------------------------------
Simon, Devizes
You do interesting things with sawdust.
No offence.
Posted: 9:23 16/10/2007
---------------------------------------------------------------------------
Nathan G
Did I post that? I don't remember doing so.
However, I'd consider using DIV tags for the pictures.
You can use these to make text flow around pictures.
Posted: 19:31 20/10/2007
---------------------------------------------------------------------------
Rob
Nice work with that looks sweet and i bet it sounds sweet as well.
Posted: 13:21 21/10/2007
---------------------------------------------------------------------------
John, Orpington
Good work! I've recently made a double-skined sub as well as an
opposed driver one, drivers in-phase, not isobaric. Wish my
woodworking skills were up to your standards, you took a lot of
care with the straight cuts whilst I relied on the sander more!
Hope it works well for you
Posted: 10:23 4/11/2007
---------------------------------------------------------------------------
Steve, Bath
Really nice sub Dan!
Is it for sale? Would you accept £500?
Posted: 11:03 11/11/2007
------------------------------------------------------------------------------------------------

  Dan, Bristol
Thanks for the offer, I would consider selling, but not for £500...
Here is a nice subwoofer for about that sort of money.
I've read some good reviews about this one.
Hope this helps.
Posted: 14:14 12/11/2007
------------------------------------------------------------------------------------------------
Pete, Poole
I like what you've done there.
Thanks for taking the time to document it.
Posted: 14:43 13/11/2007
---------------------------------------------------------------------------
Gary, Saffron Walden
I love what you done here, it's great although in a similar
construction I assumed k=0.733 which gave far better results.
Keep up the good work and hope everything works out for you.
Posted: 11:13 21/11/2007
---------------------------------------------------------------------------
Todd
Nice build. It came out beautiful.
I would say that is some nice woodworking, Better than mine.
Personally I would have gone for a subwoofer with a higher Xmax,
but hey just a preference.
Posted: 18:23 21/11/2007
---------------------------------------------------------------------------
Mark Baker, New York
I really enjoyed reading about your project...
I did build a sub enclosure myself back in 2000 and reading your
project has inspired me to build another.
Thanks Mark (Ex pat from Bristol living in NY)
Posted: 11:39 06/12/2007
---------------------------------------------------------------------------
Dan Massey, Kinger
You have accomplished something truly remarkable here Dan
and I applaud you for it.
It's incredible what can be achieved when you really put your
mind to it, and you deserve a pat on the back.
I think I love you! xxx
Posted: 9:12 03/01/2008
---------------------------------------------------------------------------
Ian, Trowbridge
Dan, You really need to get out more matey!
Posted: 14:56 07/01/2008
---------------------------------------------------------------------------
Shaun, Bristol
Fair play Dan this all looks mint!
Posted: 16:46 10/01/2008
---------------------------------------------------------------------------


Send me email | top | test